Case 1 "Fan" EN
Alarma 2086-ID
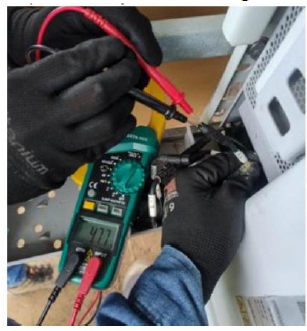
This indicates a possible failure in the fan with the specified cause ID, so it is necessary to inspect the tray where the fans are housed and take voltage measurements. Additionally, you can swap the fan with another one—if the alarm is triggered with a different ID, it would indicate that the fan is defective. However, if the alarm persists with the same ID, you should take voltage measurements again and send the logs once more to continue the analysis.

For SUN2000-(75KTL-M1, 100KTL-M2, 110KTL-M2, 115KTL-M2)
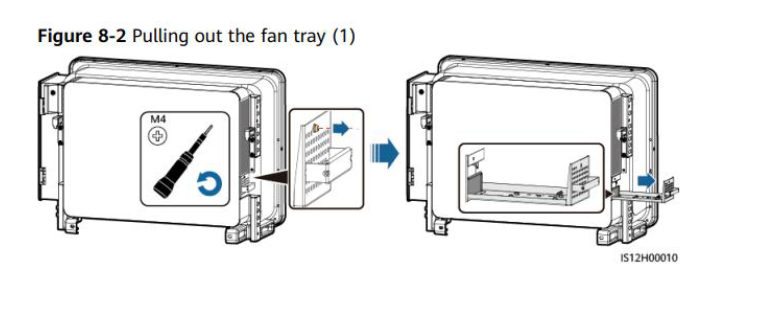
- Step 1: Remove the screws from the fan tray and store them properly. Pull out the fan tray until it is flush with the inverter cabinet.
- Step 2: Remove the cable ties securing the cables, unscrew the connectors, and disconnect the cables.

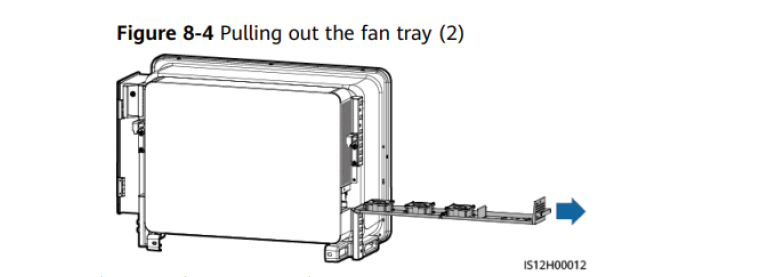
- Step 3: Completely remove the fan tray.
- Step 4: Remove the cable ties from the defective fan.
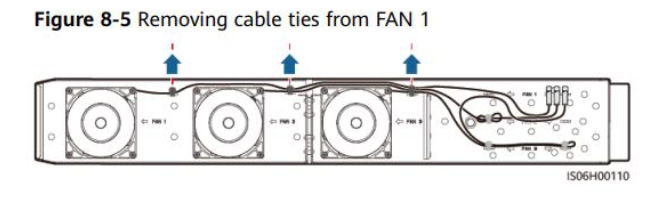
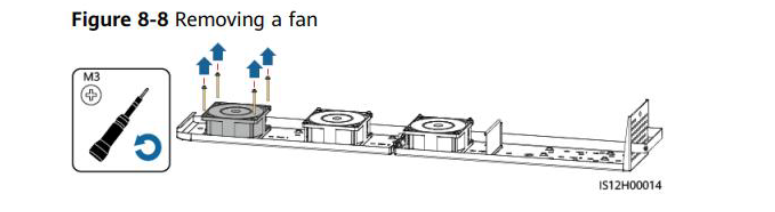
- Step 5: Remove the defective fan (using FAN 1 as an example).
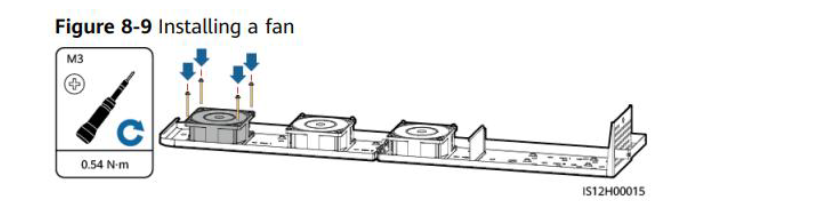
- Step 6: Install a new fan (FAN 1 is used as an example).
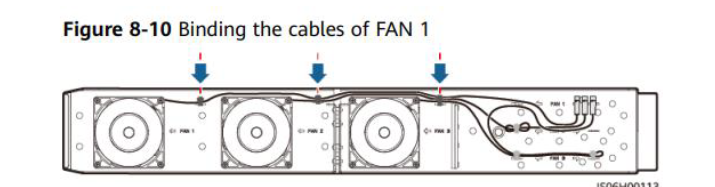
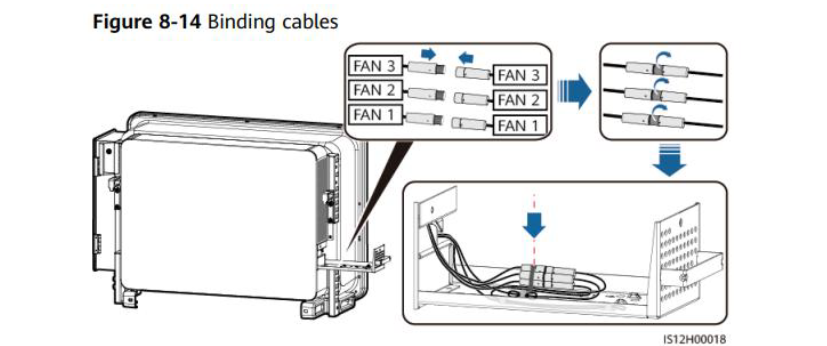
- Step 7: Connect the fan cables.
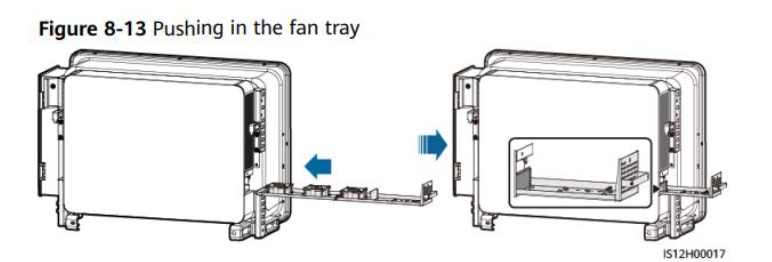
- Step 8: Push the fan tray back in until the fan deflector plate is flush with the inverter cabinet.
- Step 9: Properly connect the cables according to the cable labels and secure them with ties.
Check whether replacing the fan with another one causes the alarm to generate a different ID. If the alarm appears with a different ID, this indicates that the fan is defective. However, if the alarm persists with the same ID, voltage measurements should be taken, and the logs should be sent again for further analysis.
Using a multimeter, measure the voltage at the fan power terminals coming from the inverter. Compare the voltage readings between each terminal. Please provide photographic evidence of the results.